10 Tips For Springtime Roof
Maintenance in the Pacific Northwest
Winter Is (Finally) Ending!
Winter is a bitterly challenging season not only for our moods but to the strength of our roofs as well. In some areas of Washington, there can be long periods of time where a home’s roof is battered with snow, ice, or freezing rain. This year has been worse than many in recent history. These freezing temps and ice storms can wreak havoc on roofs causing the materials and components to contract and expand, leading to cracks, holes, tears, and finally – yup! – a water leak. We would not be surprised to get a lot of calls about this as things start to thaw out.
Let’s delve in more on the effects that wintery Jack Frost has on our roof, and how important a post-winter springtime roof maintenance routine really is.
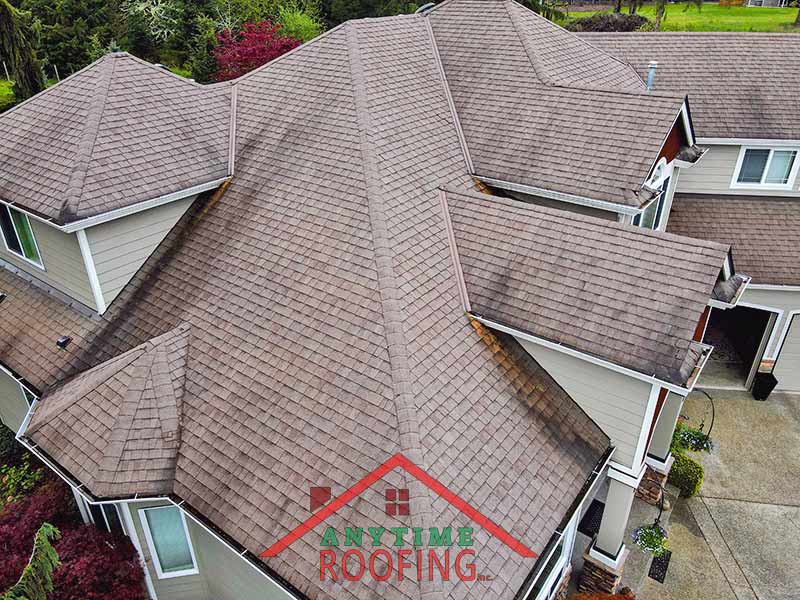
There is a necessary routine for effective roof maintenance and it requires consideration of seasonal and climatic changes.
What does a cold winter do to my roof?
- Snow can collect, then melt and freeze over again to form ice. This fluctuation of temperature throughout winter makes any material change its integrity. Cracks can appear in joints, loosening and tearing of seams, and other roofing materials. From shingles on the outside to attic rafters on the inside, they deteriorate over time from the expansion and contraction due to extreme and frequent changes.
- Flashing is thin, though it may be a metal, it’s susceptible to these changes too. It can become brittle and then corrode from snow and ice melting, which weakens its sealing benefits.
- Caulking used to seal flashing is under pressure and may break, crack or crease.
- At higher elevations in Washington, ice dams are possible. Ice dams occur when water freezes in gutters and then builds up onto the surface of the roof. As the ice melts, it can’t get past the frozen downspouts – where does the water go? Worst case: water is absorbed into the decking and then drips down into the soffit and fascia creating rot over time.

- Curling, broken, cracked shingles are also signs of the freezing and thawing process we see during winters. Particularly asphalt material, which is one of the most popular shingle materials in the pacific northwest.
- Once water enters into vents, it may freeze over and block airflow. Heating bills go up to counter the ineffectiveness of warm air staying inside during the winter.
- Water can seep into the insulation creating another potential for rot to take place.

Busy Beavers!
While roofing contractors like Anytime Roofing get a number of calls as winter storms roll through, the spring is when our schedule starts to fill up. This is another reason it makes sense to think ahead if you’d like to schedule an inspection, repairs, or a roof replacement.
With spring just around the corner, everything is coming back to life, and so are you! If you’re able to make your own inspection, be sure to document everything you see with notes and photos. Even if you don’t find any major problems, you can compare pictures from one year to the next to help predict what might need to be addressed. It’s important to note that you should never go up on the roof while it’s cold and brittle. Of course we would urge you to exercise caution and stay off of the roof to the extent possible, while still making a thorough inspection.
Should I inspect my roof in the spring or fall?
Okay, winter is over, and you want to enjoy the Spring. We get it!
In our opinion it’s better to take one afternoon to make a roof inspection, then hope for the best and live with the consequences.
If you do your own inspection and find any areas of concern, a roofer will take your notes for their reference, inspect your roof with their very meticulous eye and give you a rundown of any recommended maintenance or needed repairs. By locating these issues in the spring, you have a longer period of dry months to schedule a professional to come out and take care of things.
Many animals hibernate in winter, and your roof, or the spaces around it, can be inviting to critters looking to stay out of the cold. Thus it follows that as things warm up, you can look for signs of animal activity and patch them up before another animal moves in to make a spring time nest.

Roofing materials need time to ‘bake’ to be the most effective. To fix new shingles requires the optimum temperature (70-80॰F) to allow it to seal for most effective waterproofing. While it’s possible to make roofing repairs during the dead of winter, it typically requires artificial heat like a roofing torch. However those newly installed shingles are more likely to crack from the intense temperature swings as the seal hasn’t been given enough time to fully cure.
So I shouldn’t inspect my roof in the fall?
Not exactly. A secondary inspection of your roof in the fall is a good idea to ensure no problems arise during the winter months. This is also the typical time of year to remove debris and clean the gutters so water easily sheds during the wetter months. The main issue is dealing with any problems you find in a timely manner.
Later summer into fall can be one of the busiest times for roofers as many homeowners scramble to ensure their roof is in good condition to withstand the coming freezing weather. This time of year can be a mixed bag of unseasonably warm days and miserably frigid days. The result is a challenge for roofing companies and contractors to schedule around weather forecasts. Sometimes repairs need to be rescheduled for the next predicted sunny day and there are less of those as the seasons start to change. By getting on the schedule of your roofing company early, this leaves ample time for maintenance and repairs to be performed.
Summer months are better for the effectiveness of roof materials to be installed properly, so roofing contractors are in demand, however the last few summers have shown record heat waves in the PNW. Temps on your roof can exceed what is considered safe working conditions. We can’t speak for other roofers, but when it gets that hot we don’t expect our crews at Anytime Roofing to work until things cool back down to seasonal norms.
Spring is a season when temperatures are a perfect balance for both roof installation, good conditions, and relatively low demand.
What do I look for in a springtime roof inspection?
Assuming you want to perform part or all of your home’s yearly roof inspection, here’s a general list of things to look out for. Of course your home may have additional items to inspect, but we’re covering the majority of homes here.
You always have the option of calling Anytime Roofing to have us answer your questions or to perform an inspection for you.
Get a clipboard, a notepad and a pen for your home inspection and start ticking off these following 10 points for your roof inspection.
1. Search for signs of life
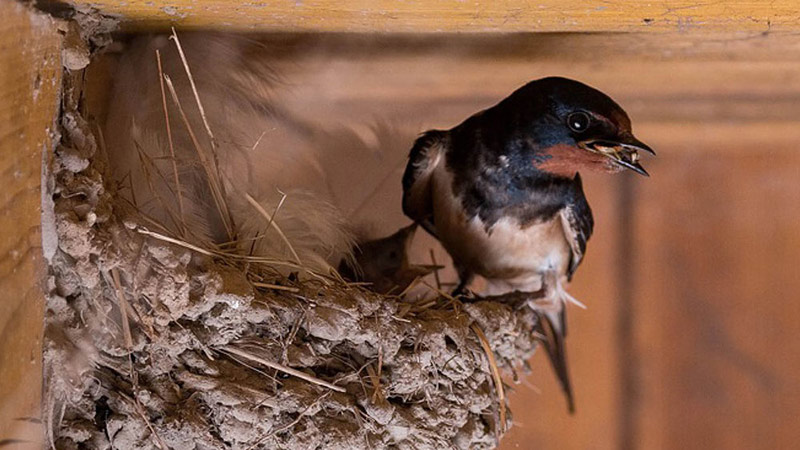
Imagine you’re a little bluebird, it’s getting colder and colder, and there’s a nice roof you’ve found with a safe and warm spot to call home for the winter. Squirrels, raccoons, bees, bats, and rats, and absolutely any animal small or agile enough to make a nest where human won’t disturb them will capitalize on the opportunity to seek shelter there. As tempting as it might be to blame them, they’re just following their instincts.
Really examine the nooks and crannies of gutters, vents, eaves, soffits and fascia in particular, but even loose shingles or an unsecure vent cover can become a refuge during the winter for insects, birds, or furry critters. Take note of signs of life, such as droppings and nests. It’s telling in itself to find evidence you had a housemate without knowing it. Take it as a favor, because that leads you to discover there is a ‘breach’ in your roof that needs dealing with as soon as possible.
Did you possibly hear strange noises during the winter, like scampering or scratching, sometimes coming from the attic? Definitely get a flashlight and thoroughly check out the attic space too then, as something could have come in through some opening in your roof. Some animals chew through insulation to get in or make a nest inside of the insulation itself. If you’re quite sure there may be or had been some life in your attic space, then wear a protective mask at the very least because some animals carry diseases. If you’re going to handle their nests and clean up animal droppings, for sure wear gloves. Afterwards, be sure to clean yourself thoroughly too.

Side Note: Don’t be a hero!
We can recall at least one incident where a renter complained of animal sounds above the shower. After looking around one of us came face to face with a large male squirrel who felt cornered and threatened. He launched himself from his hiding spot and scared the bejesus out of our guy investigating the hole in soffit. Thankfully nobody fell from the roof that day and the opening was able to be closed off again. The point being, if you suspect you have an ‘uninvited guest’ we suggest you call animal control or a pest service. Once your home is pest free, a roofer can help to repair any openings to keep your intruders out in the future.
2. A rolling stone gathers no moss, but a roof does!
As frost melts and the water dries very slowly in the final stages of winter, moss, mold, and algae may have been happily colonizing away on parts of your roof. Mold will have been thriving from the shade offered by trees, so they will usually be found on parts of your roof near any such foliage and the cover they provide. In the PNW, this can also apply to the north side of any structure. While they differ, Moss and Algae benefits from all that organic goodness of tree debris (leaves, branches, flowers etc).
Mold…
- Appears as black, brown or very dark green streaks.
- Rots away wood materials, such as wood shakes or shingles, when mold invades the absorbent material of wood. Then it could infiltrate the drywall and over time affect the health of those living in the home (especially those with already impaired respiratory, such as asthma sufferers).
- Has an undeniable musty smell, and it’s most obvious in the attic space. It’s where the heat in the home collects (mold paradise) and there’s not much airflow, so if there’s any mold present in the insulation you’ll be able to sniff it out easily.
- Is found usually on the ceiling and/or attic walls. A telltale sign of mold is watermarks and stains.
- Causes paint to peel off any surfaces.
- Breaks down and erodes away the layers of asphalt shingles.
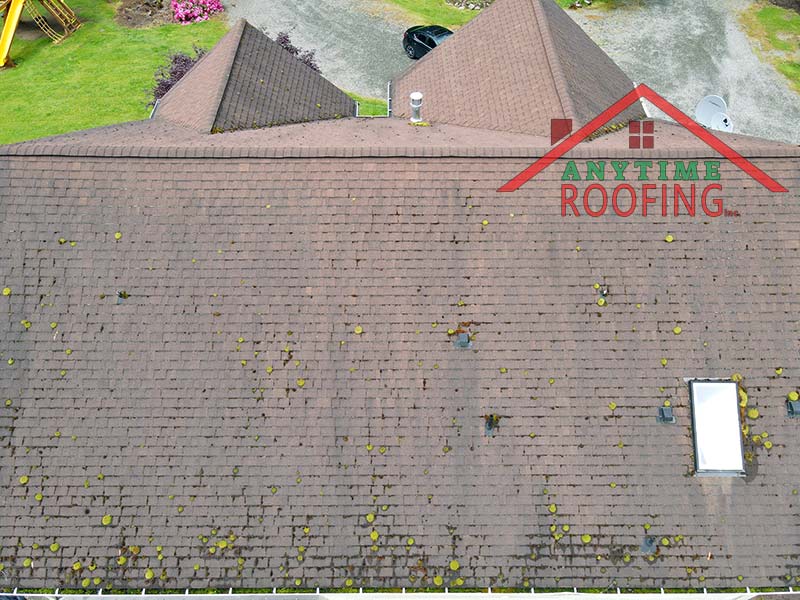
Moss and Algae…
- Algae Covers rooftops with streaks of dark coloration (and can have a somewhat green tinge).
- Moss can take hold in the crevasses between shingles and start to multiply, eventually covering a large area.
- Like mold, both Moss and Algae benefit from wet, damp, environments. However, because it’s a plant it does require a bit of sunlight (unlike mold, that needs none of that vitamin D!) Note the sides or sections of your roof that get the least hours of direct sunlight during the day because it’s the last place that dries after any rain. Moss and Algae will start there and then spread for the balance of damp and a bit of sun.
- Can also be found easily in gutters, and after some time can cause a blockage of your gutters and prevent water from effectively flowing off and away from your roof. This becomes an ideal place to reproduce!
- Algae consumes limestone, which is a component of many parts of the home. Asphalt shingles are manufactured with limestone filler. Once the algae consume the limestone for their energy the black marks are the waste of this process. Gravity causes the waste residue to create the effect of streaks on a roof.
If it’s only one or two patches of algae or mold, you could treat that yourself to mitigate the spread. Keep checking on those patches for a few months after treatment, and if the growth returns have a professional assist you.
When treating any growth patches you might find, you can use specialized products for this. Some people prefer to use a mix of bleach and water to kill the mold and algae. After the treatment sits on the roof for about 20 minutes, rinse it off. If the treatment was effective the plant matter will start to turn brown at which point it becomes easy to remove with a broom.
For mold, the method of treatment will depend on the location and how advanced it has become. Just use a hose to wash your asphalt roof shingles. A pressure washer is too intense and will cause damage to asphalt shingles.

For future prevention, you could also install some zinc or copper strips close to or on the ridges of your roof to help in deterring mold and algae growth to recur again anytime soon.
However, if your roof ridges are quite high above the ground or you have a fairly steep roof, we absolutely recommend having a professional install these metal strips. If your mold or algae growth is quite extensive, have it cleaned professionally and an inspection of your attic, insulation and drywall by a professional sooner than later too. They can use moisture meters to detect the conditions that help mold grow and suggest enhanced ventilation or other measures to eliminate the risk of this issue in the future.
An ounce of prevention…
This might sound like a bunch of nonsense to some, or like we are trying to upsell professional inspections. Well, think what you want, but there have been studies linking the presence of mold and mildew to all types of illness and disease. You can’t always rely on your sense of smell to detect this trouble either. Of course it’s up to you how serious you want to take this advice, but we promise you that we’re not banging on about it for no reason.
3. Keeping the trees away
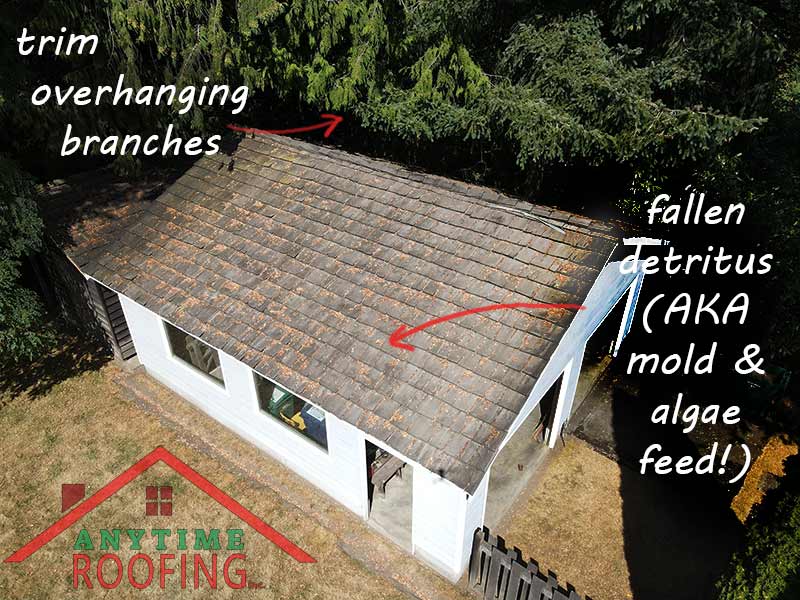
One especially good reason to trim overhanging branches and foliage is covered in the first tip we mentioned – the many creatures that use them for access onto our roofs. Ideally you would trim the foliage back from your roof, but it’s hard to say how far to cut it back in all cases.
Another reason is covered in the second tip mentioned, concerning mold and algae. An algae situation will continue to fester as tree detritus feeds their reproducing capabilities, and mold (a danger to our health if allowed to become out of control and spread to the interior of our home) is given the shade from sunlight by the tree cover.
The biggest concern from trees however, is actually from direct damage. Over time, branches can grow to encroach your roof. Eventually they may scratch away at your roof materials and damage them over time. Besides the daily brushing back and forth, a severe storm could exert enough force to stress a large and heavy branch to break off from the tree and crash into your roof. Shingles can come loose or break completely to expose a hole for water (and more!) to enter.
If you’ve got a mammoth of a tree near your roof, best to leave tree pruning to experts who have all the extensive experience and chainsaw gear needed to prune it safely.
If you are confident to do minor pruning yourself, spring is a good time for this activity. We would urge caution of your ladder placement and to have a buddy. This is key because you’ve also got a sharp tool in your hands you will likely need both your hands to use when cutting through any tough tree branches.
Another reason is covered in the second tip mentioned, concerning mold and algae. An algae situation will continue to fester as tree detritus feeds their reproducing capabilities, and mold (a danger to our health if allowed to become out of control and spread to the interior of our home) is given the shade from sunlight by the tree cover.
4. Keep that water moving
So, there’s no trees or hedges hanging over or near your roof, but you will still find bits of debris in your gutters. Wind picks up all sorts, such as seeds, flowers and leaves and it catches and collects very easily in these gaps of your roof. When it rains, the debris starts to pile up and cause a blockage in the whole system where water can’t flow freely. A domino effect occurs as the weight of it all stresses out the material strength of the gutter. Eventually not only will this cause blockages, but if left unchecked for long enough, the weight can cause breaks in the joints or stress the attachment points.
If you regularly clean your roof in the fall after the majority of leaves have fallen from trees, then you’re probably not going to find much debris in the spring. However, depending on the trees in your area and the type of winter it’s been, it’s not a bad idea to do a secondary check in the spring. Remember, all of this organic matter becomes food for the moss and algae.
Depending on the type of roof you have and your level of confidence, a short session with a leaf blower can remove a lot of this debris. Just be sure to blow from the top down so you don’t dislodge any shingles.
Once you have dusted off all the loose pine needles and other debris, run a hose over everything in the same top to bottom fashion. As you do this, have someone else looking from below to ensure the water is coming out of the downspouts and running away from your foundation. Ice over the winter may have dislodged some of the system, so don’t assume things are working as expected, but confirm it instead.
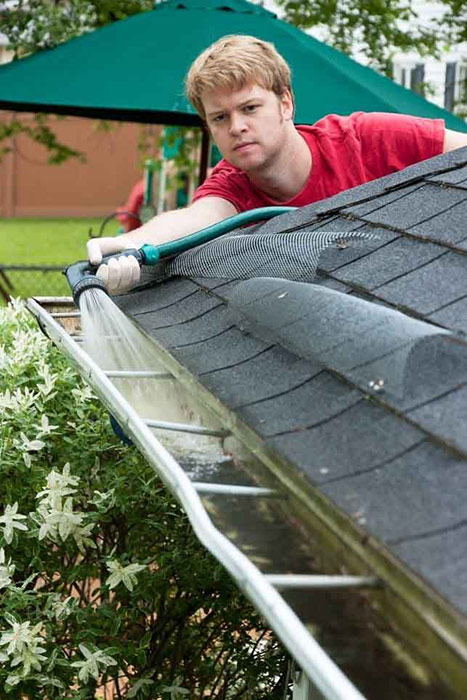
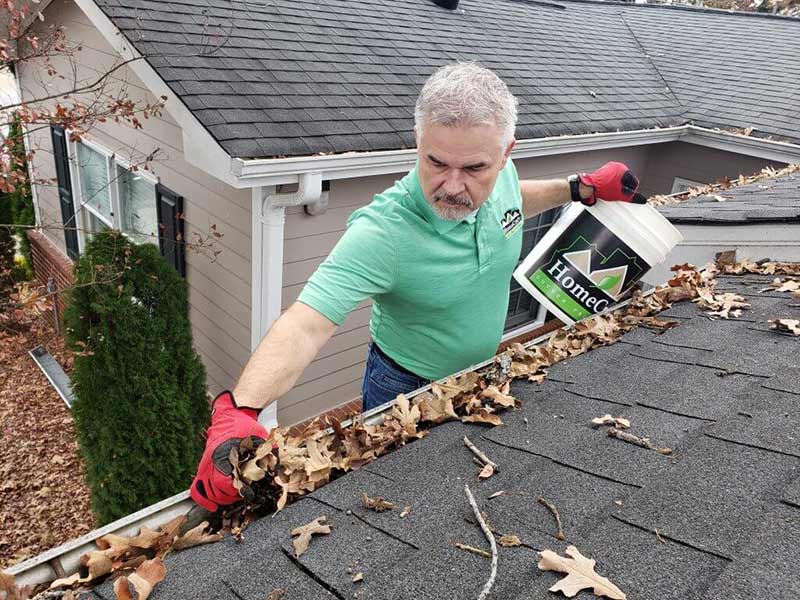
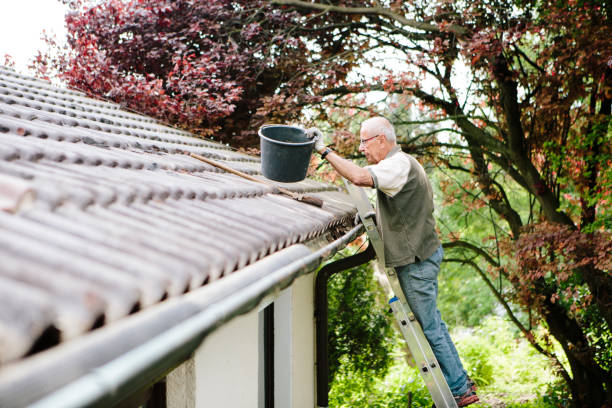
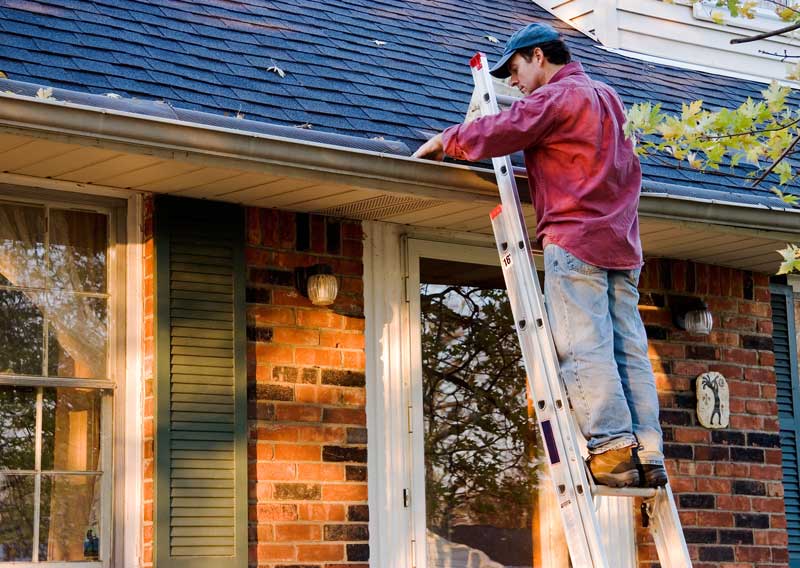
5. Get your mind in the gutter! (so to speak)
Gutters are like the sewer system of your roof. They end up catching everything and when working properly they move water and debris off the roof and away from your home. We’ve covered this topic in our article about How To Extend The Life Of Your Roof. But, it’s worth repeating because it’s pretty important.
Our personal philosophy is you should clean your gutters in the fall and then rinse them again in the spring. Sure, it’s not a fun job, but like anything, the more you do it, the easier it is. By preventing build up, the task becomes a fairly quick and easy one. If you’re like many homeowners, you have probably skipped a few seasons though as life keeps us busy and we tend to focus on what’s in front of us, not what’s over our heads.
So, as we already touched on before, if there’s a small leak it could be an easy fix to tighten up parts of the gutter system. If you do find tiny holes that aren’t fixable with tightening of screws then you can temporarily go over them with a strong sealant. Check on them every once in a while to make sure the sealant fix suffices. During a downpour is a good time to make sure your gutter system is whisking away water from your roof. Or better yet, once the sealant has had a couple of days to harden, conduct the test of rushing water from a hose as you did before.
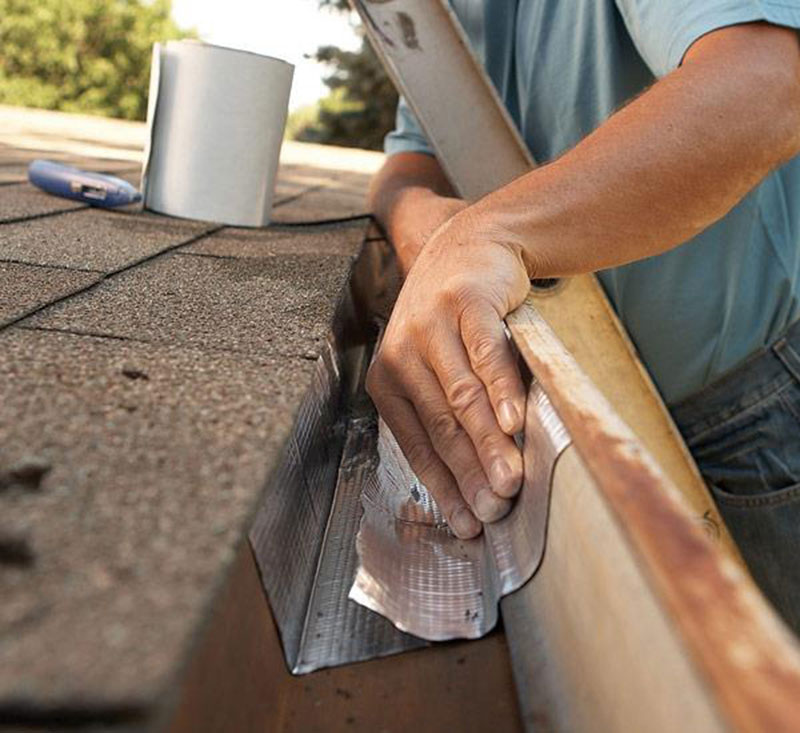
Larger holes will need a patch sealed over the hole. Metal patches would be best for a waterproof seal – only if your gutters are of the same metal material (so copper gutters would work best with copper material patches). This will limit the corrosive effect caused by two different metals. You can use flashing, which you can buy new or find some leftover from a previous DIY project. Many roofers hold on to left over flashing from their projects (if their clients don’t want to store them) for easy fixes such as this.

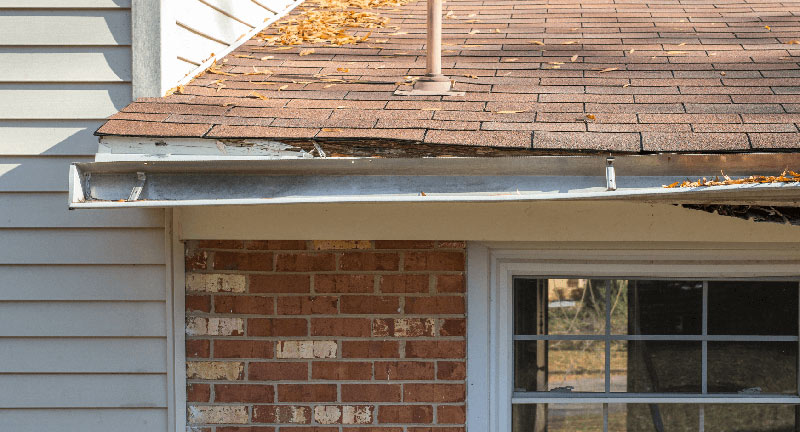
You might be tempted to just ‘ding’ a metal gutter back into some semblance of a water-catching system with a rubber mallet, but if it’s so dented and warped it just won’t do an efficient job for you really. Rather than try to mold it back into its original shape, just replace that section (if your gutters are not continuous). The reality is this type of sag is typically caused by a rotten fascia board. The gutters are made of lightweight material and need to be supported every few feet. Once a fascia starts to lose its integrity, it will no longer hold the screws that support the gutter.
Once you replace the fascia (if it was rotting), you can then replace the sections of gutter that failed. When doing this you should note the direction the water is meant to travel. Although it’s not noticeable from the ground, gutters are not level. They typically slope with a drop of one half inch for every 10 feet in the direction of the nearest downspout. If you’re replacing a section, try to match the existing slope and test that the water is flowing once your repairs are complete.
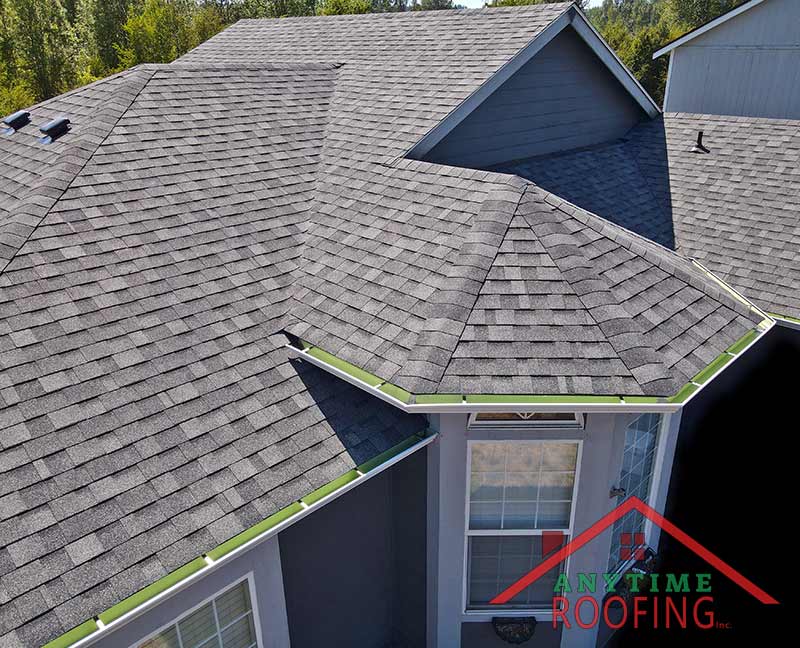
6. Flashing keeps it all together
Flashing is used extensively where different materials and components of a roof meet, such as insulation vents, chimneys, skylights and dormers. It’s found where water leaks would most likely happen, so if the flashing isn’t doing its job properly, there’s very likely going to be water leaking in. Flashing is also very difficult for animals to get through and make your roof their home – so it offers more benefits than waterproofing!
The flashing directly about your gutter system is known as a drip edge. This keeps water from wicking back up into the roof deck, fascia board, eaves and rafters. So if you find any rot in these wood materials of your roof, it could be the flashing had failed.
The perfect time to check the drip edge flashing along your gutters as you clean them. If you find any part is loose or sticking out abruptly, we would recommend removing it so you can see what the extent of water damage and rot is to the wood underneath, if any. Of course if you don’t feel qualified to do this personally, note the location and have your preferred contractor check it out for you.
As mentioned, flashing is found all around the exterior of your home and especially on your roof. Give all of it a quick visual inspection. You should look for any seams that are sealed with caulking or tar. Years of UV rays and temperature changes will eventually cause these sealants to become brittle and crack or fail outright.
7. Shingle Exam
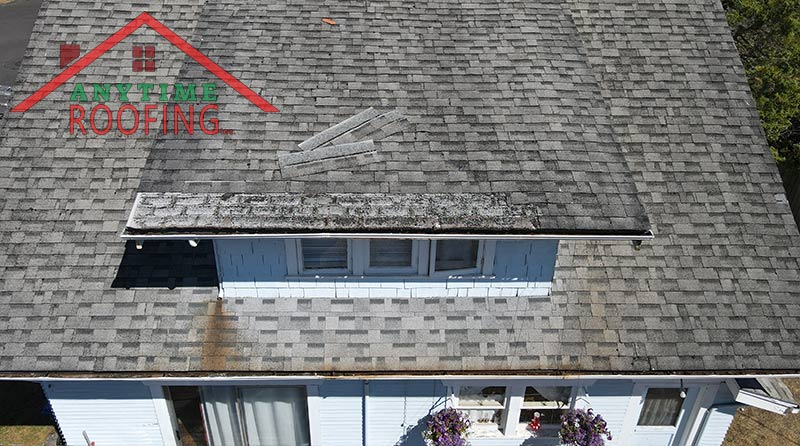
Roof shingles get the brunt of it all – weather, animals, trees, hail, snow, rain. It’s amazing what modern roofing technologies have accomplished to defend us from the elements. That said, nothing lasts forever!
Take note of the areas where there are leaves accumulated. This large amount of debris concentrated in one area can trap water or moisture, leading to the growth of algae and mold.
As you assume the role of roof cleaner, carefully examine those shingles in that area to identify any sign of such growth, and all other shingles of your roof if there are any that have come loose, or any just totally missing, any torn apart. Such damages occur after a storm with strong, relentless winds, so if you recall such a time during winter, that event may be what had battered your shingles.
Address any imperfect shingles as soon as you discover them, to prevent a water leak starting or getting worse. Left unattended, a loose shingle this year will be a drip in your home next winter. It’s always better to deal with these things before they become worse.
8. Those Nails Be Popping!
No, we’re not talking about your last trip to the beauty salon, but we’re sure those nails are On Fleek!
In a previous article How to Stop a Roof Leak, we discussed nail ‘pops’ as a likely culprit for a water leak.
Spotting nail pops can be tricky. They don’t always show through completely at first. Once they do you probably already have a small leak even if it’s not showing up inside your ceiling yet. To the trained eye, subtle little raised bumps can be the signs of nails starting to pop. Compare different areas of your roof and look for minor inconsistencies. If you notice something, take a closer look. Be cautious when lifting up shingles to inspect the layer below then though, as this can backfire and cause (or worsen) damage to an aging asphalt shingle.
It may be tricky to spot, and for those shingles on the part of your roof that’s quite high above the ground or on a steep slope, we couldn’t recommend more to leave the inspection to experienced roofing contractors.
Let’s assume that your roof pitch is one you feel safe to inspect yourself and you have a harness to keep you from falling off. Let’s also assume that if you’re reading this that you are the DIY type. So what do you look for?

Some reasons why nails ‘pop’ are:
- Nails were too short or damaged with corrosion.
- Smooth shank nails were used (instead of Ring Shank)
- There’s a pattern for nailing shingles properly, and it was done improperly.
- Roof decking (the material your nail needs to anchor into) has deteriorated.
- Adhesion between shingles may be deteriorating.
- It’s just been one too many storms with strong winds.
What to do if you find loose or popped nails on your roof?
For the shingles you can access safely, you will need to remove the nail completely because it’s just not doing you any favors. For a temporary solution, use a sealant of roof cement or tar in the hole left behind from the popped nail you’ve just removed. You will need to nail down that shingle (with a new appropriate replacement nail – a suitable length nail shank) about an inch away from that hole.
As with any temporary fixes you make, keep an eye on the roofing material once in a while (especially during rainstorms) to make sure it’s not allowing water in.
Note Of Caution:
Trying to do a ‘minor repair’ on an asphalt roof can trigger a much larger job than you anticipated. You start out just trying to patch or repair a loose nail and before you know it, you’re replacing several rows of shingles. In the end, you may realize that trying to save a few bucks with a DIY solution not only wasted your time, but could have the potential to cause a much larger repair later. Our advice, call a local roofer and have them give you their opinion. Smaller roofing contractors would be happy to make a minor repair for you to earn your business later when it comes time to replace your roof.
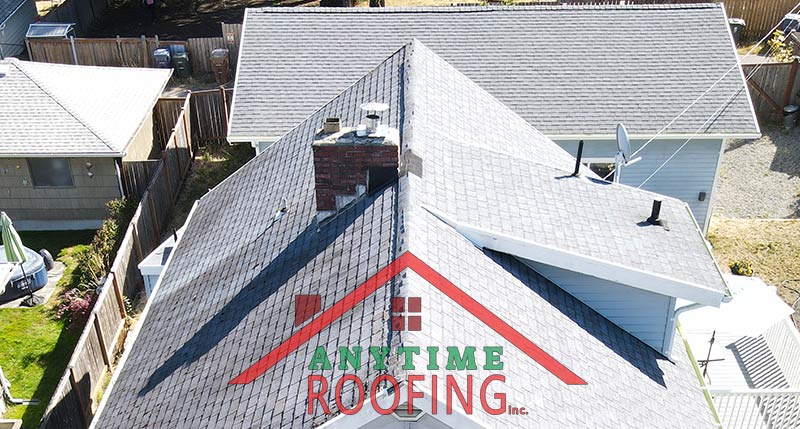
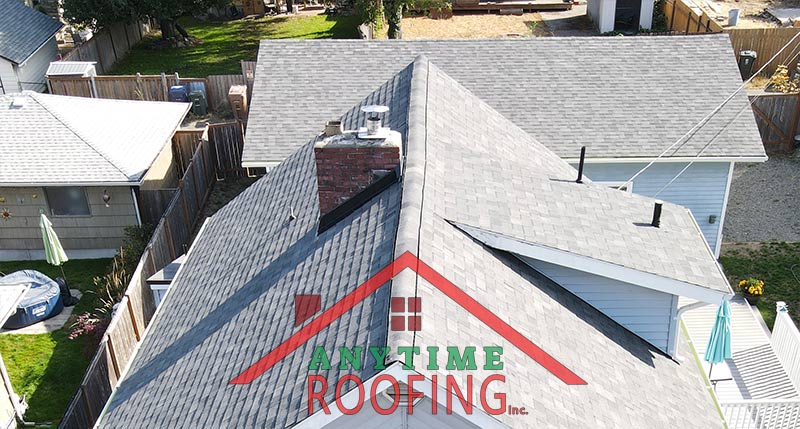
9. Chimney Inspection
Chimneys are such an inviting opening to animals. That’s especially true of seldom used fireplace chimneys. Winds, rain, snow and ice also play havoc on your chimney if not maintained regularly. Like your roofing material, spotting any issues with your chimney early can save you hassle and money later. A roofing contractor can help to seal around your chimney, but for issues with brick and mortar chimneys, you will want to contact someone that does masonry work. Luckily most roofers will have someone they can recommend because the two professions often work on projects at the same time.
What to look for during your first inspection of the year, now winter is well and truly over?
- The life-saving chimney cap gets the brunt of the elements, so inspect that component of your chimney first. If the damage is quite extensive, you may need to replace the cap entirely for the sake of your flue liners and dampers that need to be sheltered from the elements such as debris, but especially any moisture.
- Any small cracks of the crown can be sealed over, but if there’s an obvious chunk of masonry missing, it’s best to have the whole crown replaced.
- Brick and mortar chimneys are susceptible to cracks over time of being weather-beaten, so look over each exposed brick. Bricks are porous, so they do go through the expansion and contraction of temperature changes, and over time get weak. If you find chunks of brick missing or large holes (or if it’s looking more like red-brick swiss cheese!) the chimney will need renovation. The mortar between each brick needs to have uniformity too – no obvious cracks or gaps! Very small cracks can be sealed over with roof cement.
- Chimneys are a cozy nook for many animals, such as rats, squirrels, and birds, so have a look inside to investigate any sign of life (Any nests? Any droppings?) If you can manage to reach inside the flue to clean it up, do so with all the protective gear we outlined for cleaning out gutters (masks, gloves, eyewear).
- Winds can pick up leaves and twigs and it can collect in your chimney, which left to accumulate can cause a very dangerous smoke or fire hazard in future.

10. Don’t Get Caulky (or Do!)
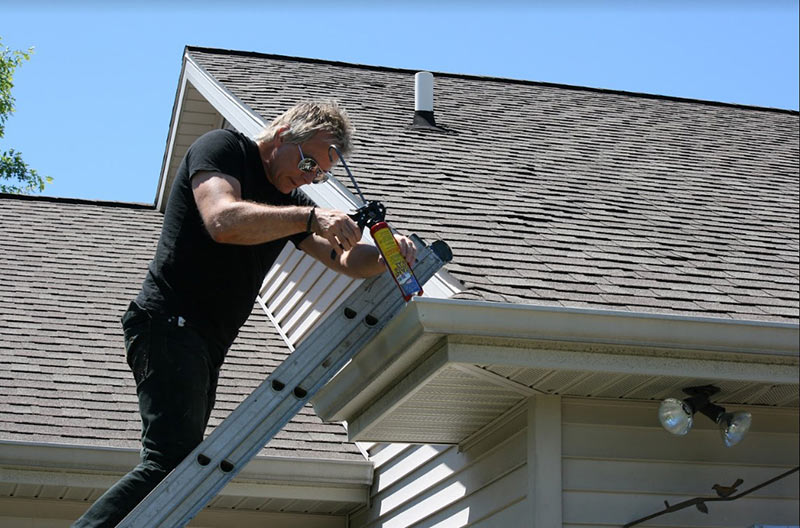
You may have a 30, 40, or 50 year roof, but that doesn’t apply to every part of that complete roofing system. Caulking and sealants wear out much quicker and their lifespan will vary on location or other conditions. This makes it one of the things you need to regularly inspect and replace.
Sealants, roofing tar, and caulk is a wonderful fix for many components of your roof that might need an easy and simple fix…temporarily! Particularly in the case of vents, homeowners will reach for those tubes of waterproofing magic very easily.
Don’t be tempted to just cover over the old layers with new sealants. To do so might seem like a time saver, but you’re just asking for trouble. Make the effort to remove any old, cracked, chipped, torn caulking and use fresh sealant against the original part of your roof. Before you apply your new caulking or roofing sealant, be sure to really clean the area and let it dry. A light bit of sanding might be appropriate to ensure you get a good bond, depending on the materials of the joining surfaces.
Another good reason to not just smother sealant on top of old worn-out caulking is how wasteful and ugly it is. You would use more than you need to to cover the damaged caulking compared to just scraping away the old product and doing a proper job. Your patches or repairs will last longer too, which means you won’t be doing the same job again in a year or two.
Don’t go for the cheapest option. Choosing a high-quality sealant gives you the best chance for it to strongly bond to your roofing parts, such as shingles and flashing, and you also won’t need to use so much compared to cheaper options.
In Conclusion:
Spring is the time of new beginnings. Nature is all around us, with animals and plants starting another cycle of life. It’s also the natural time of year for home maintenance projects as well. Like a bear coming out of hibernation, your roof is also waking from its winter haze.
Doing a springtime roof inspection can save you from financial woes or sleepless nights down the road. Any problems you find in the spring, leaves you a good window of time to get these issues corrected before the weather turns nasty again next winter.
And don’t forget to enjoy the fresh Springtime air, cool breezes and bursts of sunshine in the meantime. At Anytime Roofing, our team definitely enjoys working on a roof during a bright spring day! If you’re in the greater Seattle / Tacoma area of Washington, let us come out and give your roof a professional inspection. We are passionate about roofing and we appreciate the chance to be your go-to roofing professionals!
One Final Note:
Our legal department would like us to point out the following if you decide to inspect your roof yourself:
- If it’s not obvious – make sure your roof is completely dry before walking about on it.
- Wear footwear that offers good traction if you’re on your roof, such as soft rubber shoes (so you’re steady on your feet and your shingles don’t get damaged).
- A sturdy, well placed ladder must always be used if you’re cleaning the gutters, trimming foliage, or any such work that requires you to be even a few feet above the ground. A rule of thumb for the safe placement of a ladder is, generally: with every 4 feet of elevation, the base needs to extend outward a distance of 1 foot.
- Leave steep and high roofs to the professionals.
- Invest in a fall protection system. A roofer’s harness and rope is inexpensive and much cheaper than a trip to the hospital.
Free Consultation
Get A Free Quote
We're Ready ANYTIME You Are!
This is Taylor.
She manages our offices with a positive attitude and an eye for detail. Taylor and her teammates would be happy to take your call or email.